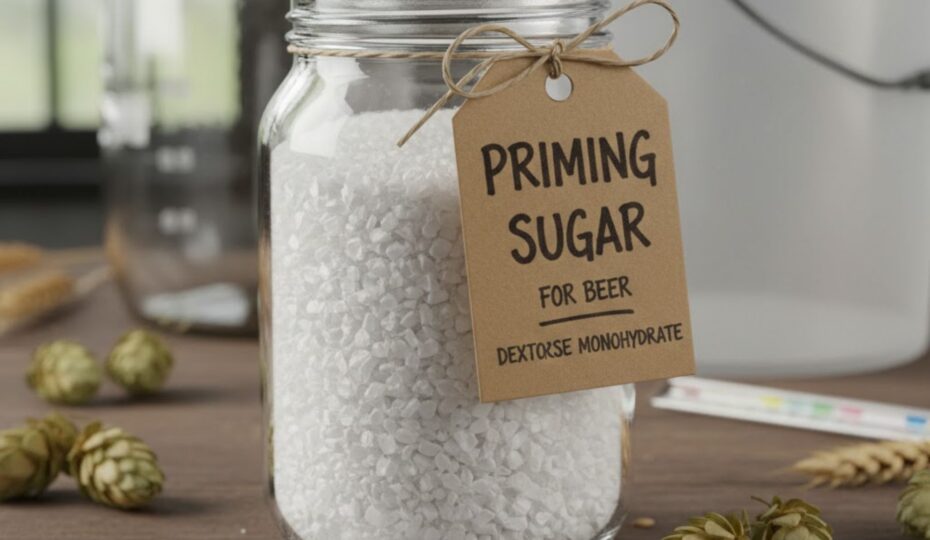
Priming Sugar for Beer: How to Get Perfect Carbonation
Priming sugar for beer is a simple method to create natural carbonation in the bottle. You add a measured priming sugar solution to fermented beer, the yeast ferments a small dose, and carbon dioxide dissolves into the liquid during conditioning.
At US Sweeteners, we supply food-grade corn sugar, table sugar, and dry malt extract for home brewing pilots and small production runs. Our multi-warehouse network supports custom packaging and fast logistics so your team can prepare, bottle, and ship with steady inventory and minimal delays.
What is Priming?
Priming is the short, controlled step after primary fermentation, where you add a small priming solution to the finished beer before packaging. Yeast ferments that sugar in the sealed bottle, which creates carbon dioxide that stays in solution and carbonates the beer over one to three weeks.
According to research, bottle conditioning achieved by adding a measured priming sugar to packaged beer constitutes an additional fermentation step in which yeast and fermentable extract are added to produce carbonation; lab protocols explicitly describe dosing bottles with a glucose (priming sugar) solution to generate CO₂ during conditioning.
This step is different from the main fermentation because gravity changes are minimal, and the goal is texture, head, and bubble structure. Priming sugar for beer gives consistent results across styles when you weigh sugar, match it to the batch volume, and keep the process clean from kettle to bottling bucket.
Benefits of Priming
Priming sugar for beer creates natural carbonation inside the bottle, which gives a tighter bubble, stable foam, and a clean mouthfeel without tanks or extra hardware. Because yeast ferments a small, measured priming sugar solution, the carbon dioxide is produced in-package and stays in solution, which can protect flavor and reduce oxygen pickup compared with force-carbing warm beer. It’s also consistent and repeatable when you weigh sugar, mix thoroughly in the bottling bucket, and keep the process clean.
Priming also supports shelf stability for home brewing and small producers because the final fermentation is sealed, and the pressure helps limit staling when handled well. Teams can use corn sugar (dextrose), table sugar, or dry malt extract to create the result they prefer, and even small versions like a touch of honey or molasses can contribute a stylistic note when the beer style supports it. The key benefit is control: you decide the solution, contact time in weeks, and the finish you want in the finished beer.
The Priming Process Step-by-step
Set up clean equipment and sanitize all contact surfaces. You will need a bottling bucket with a spigot, a siphon, tubing, a filler stick, caps, and a capper. Use a scale for accuracy because cups vary by compaction. Have enough clean bottles for the full batch volume with a few extras for samples.
Weigh the sugar, add it to 1–2 cups of water, heat to a short boil, and stir until dissolved. Cool the solution, pour it into the bucket, and rack the beer gently onto the syrup. Mix with a sanitized spoon using slow, broad strokes so you do not splash. Fill each bottle to a consistent level, cap firmly, label the batch, and store at room temperature so yeast can ferment the priming sugar and carbonate the beer.
Types of Sugars Used in Priming
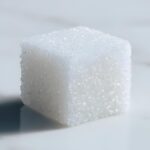
Corn sugar is dextrose produced for food use and is the most common primer. Brewers prefer it because dextrose dissolves fast, has a neutral flavor, and yields predictable fermentation. A 5-oz package is popular in homebrew shops for a gallon batch scale of five, and the same sugar scales well to larger gallons when you use weight and adjust the solution for your process temperature.
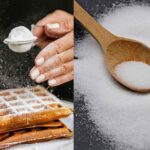
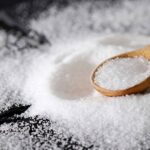
Table sugar is sucrose and works well for priming when weighed and fully dissolved. Many brewers use it for beer making because it is easy to source and does not push flavor when used at priming levels. Dry malt extract, often called DME, can prime too; it brings a light malt note and can contribute head retention, but DME versions vary in fermentability, so your calculation needs a small review before you create a priming sugar solution.
Other Options
Honey can carbonate beer, but density and composition vary by source and season. If you choose honey, make a small test bottle on a split batch, record the sign of the outcome after conditioning, and adjust on the next run. Molasses is strong in flavor and color and is best reserved for dark styles where you intend that character; treat it as an accent that can alter the profile if you add more than a minimal dose.
Some brewers blend sugars to balance fermentability and foam. For example, a light honey note with mostly dextrose keeps results predictable while adding a hint of flavor. When you try blends, label bottles by solution recipe, keep notes on temperature, and review each version after conditioning so changes roll forward in a controlled way.
Uses of Priming
Use priming when you want bottle-conditioned character, even carbonation, and a simple path from tank to package. It’s common for English ales, saisons, and mixed-ferm brew projects where the last point of carbonate is intended to be in the package. It also fits seasonal or limited releases where teams want a traditional texture and a clean sign of maturity after weeks of conditioning.
Priming is also practical for trials and split batches because you can prepare different solutions in the same session to compare differences in flavor and volume. One example is running corn sugar in half the run and DME in the other to review the head and mouthfeel. Another use is conditioning small “heritage” lines or cask-style making, where low carbonation is the goal. Because priming is a simple, sealed step, teams can bottle, label, and roll directly into retail or taproom shelves after QA, no extra tanks needed.
Packaging Formats and Inventory Planning
Choose package sizes that match your cadence. A single 5-oz pouch is handy for a five-gallon batch, while 10–50 lb bags fit pilot runs and frequent bottling. If you carbonate often, move to pallet quantities with clear labels so each shift can pull the correct amount for the day’s volume without delays. This helps keep the bottling bucket filled on time and reduces risk from last-minute substitutions.
If you are looking for a steady supply, we offer bulk corn sugar (dextrose), table sugar, and DME with custom packaging and fast nationwide delivery. Visit our Brewery & Winery page to see pack sizes from 5-oz pouches to 10–50 lb bags and pallet options, along with lead times and shipping details. If you like to keep bottling on schedule, this page shows clear options you can order again and again.
Plan reorder points by weeks of coverage instead of single batches. Track average use by brew style and season, then set a reorder trigger that keeps at least two weeks of buffer on hand. If you want a price break, first-time subscribers to email updates may receive a discount; check the offer’s valid dates and program details on the site before you place your next order.
Storage and Shelf Life
Store sugar in a cool, dry place with the bag or pail sealed after each use. Moisture causes clumping, slow dissolution rates, and inconsistent mixing that can lead to uneven carbonation across a batch. Keep packages off the floor, away from strong odors, and out of direct sunlight to protect quality across weeks of making and packaging.
Shelf life for dextrose and sucrose is long when sealed and dry; most producers mark best-by dates that reflect packaging and handling rather than sudden spoilage. DME is also stable when dry, but it absorbs moisture faster than simple sugars; once opened, press out excess air, close the package tightly, and use it soon. If you manage multiple sites, add a link to your SOP that includes lot codes and storage checks so teams record the point of receipt and rotation.
Why Temperature and Residual CO₂ Matter
Carbonation depends on how much carbon dioxide the beer already holds and how much the yeast will produce from the added sugar. Warmer beer holds less dissolved CO₂ than cool beer, so a warm batch often needs more sugar than a cool batch to reach the same texture. This is why two brewers can use the same priming sugar for beer and get different results when temperatures differ.
Track the highest post-fermentation temperature and keep it in your notes with batch volume and primer type. That single data point feeds calculators and helps you repeat a good result. It also keeps adjustments small and clear if you need to alter a dose on the next brew.
Fermentability and Brand Differences
Dextrose and sucrose ferment fully under normal conditions and contribute minimal flavor at priming levels. DME fermentability varies by product; the apparent attenuation on a spec sheet may not match what yeast achieves in the bottle, which is why many brewers increase the DME weight compared with dextrose. If you use DME, write the brand, version, and weight in your notebook so you can repeat the result.
Honey and molasses bring more than sugar, dextrose, or sucrose; they carry minerals and flavor compounds that can change the profile. If your style benefits from those notes, keep the dose modest and test on a few bottles first. The best sign that you hit the point you prefer is a clean pour with a stable head and no harsh bite.
Clean Mixing and Even Carbonation
Uneven mixing is a common reason carbonation varies bottle to bottle. Always dissolve sugar fully before transfer, rack the beer onto the solution to help blend, and mix with slow movements that keep oxygen out. A gentle roll of the bucket on a towel can help if the solution was very thick, but avoid sloshing that traps air.
Fill bottles to the same height to keep headspace consistent. Headspace changes pressure and can alter carbonation even when the solution is correct. Use a filler stick that sits on the bottom so each pull reaches the same level when you remove the wand. This simple step pairs well with weighed sugar and a clean process to produce even results.
Basic Troubleshooting Without Overlapping Dosing Content
If carbonation is low after two weeks, move bottles to a slightly warmer room and give them a few more days. A gentle single roll can minimally re-suspend yeast without shaking. Check your notes for packaged volume and temperature, and update the process on the next batch.
If carbonation is high and foam surges on opening, chill bottles well before serving, and review your process notes for early bottling or uneven mixing. Confirm that you fully dissolved the priming solution and filled bottles to the same level. Use calculators next time for an extra check, and keep any change small so results move in steady steps.
Conclusion
Priming gives you controlled carbonation with simple tools and a short list of steps. Choose a primer that fits your flavor goal, store it dry and sealed, and mix a complete solution before bottling. Keep records on temperature, fermentability, packaged volume, and outcomes so each brew improves in small, steady moves.
At US Sweeteners, we supply corn sugar, table sugar, and DME in sizes that match your batch plan and schedule. If you require custom packaging or prefer faster delivery from our multi-warehouse network, we can help you maintain on-time bottling with reliable stock. Contact us to learn more.
FAQs
What can I use for priming sugar for beer?
Use corn sugar (dextrose), table sugar (sucrose), or dry malt extract; advanced users may also use honey or molasses after conducting a small test.
What does priming sugar do for beer?
It feeds yeast to ferment a small dose in the sealed bottle, which creates carbon dioxide and produces natural carbonation.
How much priming sugar for beer?
Use a reputable calculator that matches primer type, packaged volume, beer style, and temperature; weigh sugar for accuracy.
Can I use regular sugar instead of priming sugar?
Yes. Table sugar works well when weighed, dissolved, and mixed evenly into the bottling bucket.